Showing posts with label Split screen VW panel van. Show all posts

Wednesday, June 1, 2016

Lucia is home!

Great to see 4 and a half generations of van alongside each other! And to take delivery of Lucia was the icing on the cake :) Thanks to Ben and Elliot for putting up with the noise for over 2 hours and getting her home safe.

A very proud looking OCDP1 giving her a final once over.

Raquel Peggy Mitchell looking very at ease in the drivers seat. The Round RobINN Pub Co. is almost on the road!

lupines and vans, what a pretty picture! Oh and the two hotties of course! ;)


Sunday, April 24, 2016

New Dawn

 A beautiful morning arrives.
 After years of work she emerges under her own efforts.
 Still tweaking details.
 Nice and straight panel van that is.....
Gary and Darren finishing off details.
 
We will have to wait a while until shes ready for a road run for an MOT unfortunately, but a little drive on the drive was fun!

Monday, April 4, 2016

Split Screens


 New and safe front glass.
 Outer door frame seal fitted.
 All new fitting kit including hardware, replacing loose old pop rivets where small bolts go.
Even added the proper bulb and a new outer headlamp seal (need inner ones?) Put some hours in again today and fitted the tailgate glass, both front screens and built up the drivers door window frame with all its wonderful felt channels and seals all around. Also cleaned and painted the quarter light frames themselves as these had been missed out somehow.

Monday, February 22, 2016

"Shes Alive!!!"

 First day back and could not resist a quick dress up having fitted the indicator eyes.
 Then quickly on to interior cab details such as sun visors, bench seat and dash grab handle for example.
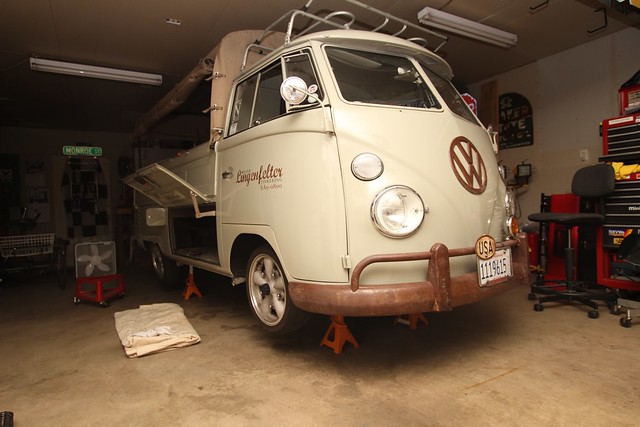
 Old badge looks brilliant, and again the tatty old door cards will look the business. Not to everyone's taste but even my eldest positively commented on the completely tatty rear bumper once added.....impressive considering the style of heritage is such a thin line.
 LED lamps versus heat lamp lighting..................must fit at least 8 of these micro spots plus an array of bigger overhead ones. Still love the heat ones anyhow!!!!
 Gear box is in, clutch cable and pedal, front bearings flushed and refitted, even have VW stamps on the bearings, LEGEND!!!! ...........................................Might need new ones though!!!!!
 Oh I also sprayed the engine bay and fuel tank, fitted the tank and the loom and then the engine.
 I am quite on a roll here in retrospect. Your battery is dead so had to fit my spare one.
 Night shifts man, that you in this space soon dude!!!!.
 Is that better than the sun or is it just a good battery and all new earths and clean connections??
 All dash lamps present and correct, need a full set of new fuses, and a load of new lamps for the fuel sender and dash lights also. Currently running on my original VW beetle brass fuses!!
Rear and Brake, Main & Full, Parking bulbs are blown, interior, dash, flashers front, side and rear all bright and working. So i finally late on Saturday night after hours of electrical systems madness (ESM Syndrome) I decided that the temptation to connect some fuel lines up and prime the engine was too big a lure. So I had to strip down the starter, it was full of a messy clumpy shit (got to be old oil, looked like disintegrated rubber?) everywhere all over the commutator, got it all cleaned, and its sort of working but its sticky as shit.


So with some fuel lines and fuel, a quick wiggle of HT leads and a little sand paper to the points HAHA......................shit loads of thick oil burn out of the barrels and she splutters to life, after she stalled I realised that i had smeared the camera lens with grub and reattempted to record this start up but the starter motor required the old hammer whack to come back to life. A reconditioned starter is required, as its interfering with the electrical supply.

Friday, January 29, 2016

THIS IS NOT A TOY.... VW SPLITSCREEN PANELVAN

This is not a toy TOP VIEW..........
 CARGO DOORS PLUS PARTS
 REAR QUARTER VIEW...note white enginebay???
 WOW................................................................................................................................
.........?????

Tuesday, December 15, 2015

The Paint Job is Booked!

Spoke to Danny this mornin and he's going to do us L345 Light Grey (original '62 delivery van colour :) Makes it nice and easy for him, and in keeping with the look.


It may be common, but then so am I! http://www.thesamba.com/vw/forum/viewtopic.php?t=311633

Image

Now we need all the trim details to be right:-


Color codeL45Light grey

Year8/1/58 - 7/31/63
Models211-216,231-238,261-268

Color CodeColor Name

Upholstery Material (leatherette)K331Grey
Beading for seatsKO59Silver beige

Headlining color

021Pearl grey

Door panel color
021
Pearl grey
Sun visor color744Silver beige
Arm rest, middle seatK331Grey

Sunroof cover colorV68Light grey

Wheel disc (center)L82Silver white

Rim (outer) colorL 82Silver white

Hub cap color
L345
Light grey

Steering wheel colorBlack

Gear shift and brake lever colorL41Black

Seat frame colorL41Black

Steering column tube colorL41Black
Turn signal switch housing005Black

Bumper colorL82Silver white
Shift boot039Anthracite

Floor mat color041Black
Door handles, inner, front door and cargo
036Silver beige
Door handle escutcheon036Silver beige

Dash, heater, choke, turn signal and shift knobsBlack

Notes

Tuesday, July 22, 1997(c) Wolfsburg West 1997Back


And I really love the red detailing against light grey (The Round Robinn Livery :)
Image may have been reduced in size. Click image to view fullscreen.

Monday, November 23, 2015

Final Split Screen Restoration Post

Its all a rebuild project now, off to the paint shop asap!!!
 Exterior door hinges seam sealed where they are riveted to the door, also stone chip to lower front valance.
 The interior if full of goodies, ready for colour, most of this has been stone chipped like the fuel tank and interior floor.
 Carpet chucked in to protect all.
 Rear valance patched up for now....a simple metal plate loads of seam sealer on the rear, fiber and filler on front then all round with stone chip.

 Interior is looking good with those cargo doors on...its so Aircraft inside.
Ready to roll...............

Friday, November 20, 2015

Stone Chip All Around

 Lower valance and all lower seams.
 Inner cab floor wheel arches and locker all done.
 Cargo floor inner wheel tubs and over engine cargo area.
 All engine bay plus ceiling. Also coated inner cab door lowers.
 Extra sealing, sound proofing and chip resistance.
 Body is now 90% ready for paint so a little more filler and work tomorrow and by next week end Paint shop!!!

Sunday, November 8, 2015

Pushing Ahead


 seam sealer washed in with solvent
 Passenger door overhauled seamsealed etc.
 Started on door filler work including cargo.
 Really taking shape now.
 Decided to cut the original upper panel seal in and seal it, the clean the vents back to metal saving time on the clean down. Top vent shows layers of paint!
 Bumper getting attention also.
 Engine deck lid inner primed and sealed, needs sealing inside the engine bay area.

Undersides ready for some stone chip seal.