OCD.......obsessive Volkswagen campervan disorder blog for the hard of sense.
Monday, May 4, 2015
Monday, April 13, 2015
Back to Basics
Very pleased as this is a good couple of grands worth of new gear. Descaled, wire brushed, acid washed, and all again, Chassis painted under and outside, then stone chip applied, Inside was 2K primer and VW gloss black. Now need some torsion seals covers and bearings to start building up the running gear. Still got loads to do on the body anyhow, but I like the idea that with the beetle you can start fine tuning the handling etc, before you've finished the body. Front beam is also nearly finished, but again need the obligatory new ball joints MEYLE style.
Wednesday, February 25, 2015
Stanford Hall 3rd May 2015
Reminder about the Stanford Hall VW Show.
Sunday 3rd May 2015
http://www.stanfordhallvw.com/
We camped last year and it was a great campsite and made a real weekend of it.
This year it falls on the May Bank Holiday weekend so camping is from Saturday afternoon until Monday afternoon. It also quite cheap to camp and includes the show price.
Camping booking has a closing deadline (and involves forms,SAE and payment by cheque) of 23rd April.
Camping Details and form here:
http://www.stanfordhallvw.com/camping/
It would be great to get an OCD group camping organised BUT you need to get organised and booked NOW!
Sunday 3rd May 2015
http://www.stanfordhallvw.com/
We camped last year and it was a great campsite and made a real weekend of it.
This year it falls on the May Bank Holiday weekend so camping is from Saturday afternoon until Monday afternoon. It also quite cheap to camp and includes the show price.
Camping booking has a closing deadline (and involves forms,SAE and payment by cheque) of 23rd April.
Camping Details and form here:
http://www.stanfordhallvw.com/camping/
It would be great to get an OCD group camping organised BUT you need to get organised and booked NOW!
Wednesday, February 4, 2015
Almost There!
All the little bloody details, like recoiling a door screw.
Repair to leading edge of rear quarter and rear panel.
Repair to rear bulkhead and edge.
Starting to knit together now.
Rear engine chassis plates holed in several places.
Chased acid washed fill welded.
Repairs also to rear and leading edges of both panels. also inner detail.
Both sides have suffered on the last edge of the rear wheel arch and the battery tray.
Needs a really thick line of seam sealant along all the key lines inside and out, and a skim of filler plus some 2k Schultz in key places.
Cut and repair.............................................................and again............................and again.......................and again.....................and again........................
Got the plates cut at work to repair the last rear top hats lower closure plate. A small patch to the cargo floor then it is just those last extra weld and two cab door lowers..................then done!!!!
Repair to leading edge of rear quarter and rear panel.
Repair to rear bulkhead and edge.
Starting to knit together now.
Rear engine chassis plates holed in several places.
Chased acid washed fill welded.
Repairs also to rear and leading edges of both panels. also inner detail.
Both sides have suffered on the last edge of the rear wheel arch and the battery tray.
Needs a really thick line of seam sealant along all the key lines inside and out, and a skim of filler plus some 2k Schultz in key places.
Cut and repair.............................................................and again............................and again.......................and again.....................and again........................
Got the plates cut at work to repair the last rear top hats lower closure plate. A small patch to the cargo floor then it is just those last extra weld and two cab door lowers..................then done!!!!
Posted by
OCDpatient1
at
12:25 PM
2
comments
Labels:
1962,
Lucia Restoration,
Split screen VW panel van
Monday, January 19, 2015
Beetle Concepts
Tried some Khaki green paint having panel beaten, cleaned back and primed one of the old damaged wings. The head lamp ring is a cheap and rusty one.
Quite like the idea of going a bit crazy on this one, washes, stencils, scratches, rust, n all and then 2K lacquering it. But a kinda Cal Street Military fusion.
If I go military I still want that street feel so low slung and alloys like black Fusch or BRMs would finish the look. I think the satin matt type paint really brings out its military origins.
Its got to be one of these colours, I believe:
Khaki
Beige
Neptune Blue
Or Mouse Grey............I don't want to run a stoker so anything goes with this one.
Stripping the interior out now, evaluating what stays and what goes, there's one hell of a lot of latter modifications to these beasts but most seem so unnecessary! There is also a lot of expanding foam towards the rear, This could be Expanded Upon, excuse the pun, to increase sound proofing.
Quite like the idea of going a bit crazy on this one, washes, stencils, scratches, rust, n all and then 2K lacquering it. But a kinda Cal Street Military fusion.
If I go military I still want that street feel so low slung and alloys like black Fusch or BRMs would finish the look. I think the satin matt type paint really brings out its military origins.
Its got to be one of these colours, I believe:
Khaki
Beige
Neptune Blue
Or Mouse Grey............I don't want to run a stoker so anything goes with this one.
Stripping the interior out now, evaluating what stays and what goes, there's one hell of a lot of latter modifications to these beasts but most seem so unnecessary! There is also a lot of expanding foam towards the rear, This could be Expanded Upon, excuse the pun, to increase sound proofing.
Split Panel Cargo Floor
Made some new closure plates for the inside of the two new front wings. These sit on the far upper inside of the arches.
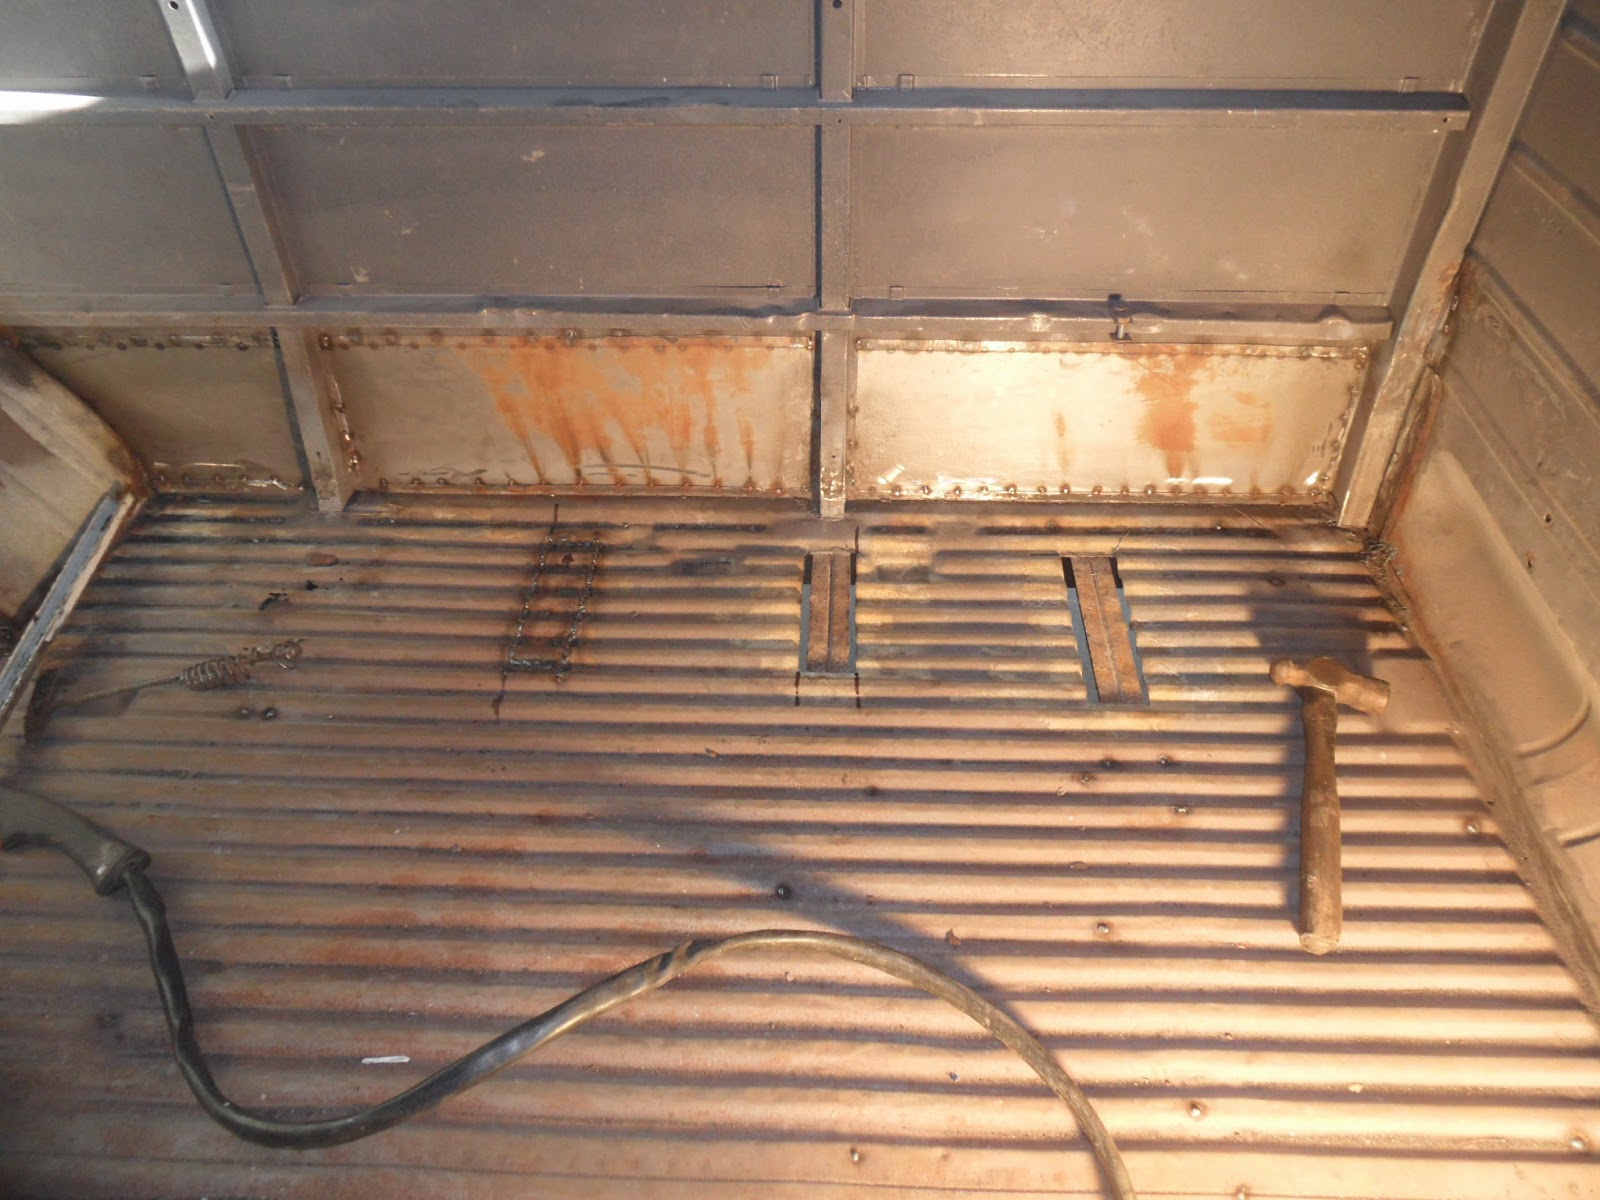
Seam welded the floor plate, and spot welded to under side.
Floor inner rear edge spot welded to side wall.
Inner stop plate edge welded.
Inner front edge of wheel tub repaired and welded down to cab floor.
Repairing cargo floor with good bits of cut out old floor (cargo door side)
Just one more section needs doing visible on the left in the first floor picture.
A multitude of additional welds here and there as I move around, anything I have missed I go over or add. Same applies to grinding on the visible sections, ground and or sanded.
Seam welded the floor plate, and spot welded to under side.
Floor inner rear edge spot welded to side wall.
Inner stop plate edge welded.
Inner front edge of wheel tub repaired and welded down to cab floor.
Repairing cargo floor with good bits of cut out old floor (cargo door side)
Cut to fit then tack weld in, tap to adjust, including using a floor jack to push the floor back level, then seam weld.
Just one more section needs doing visible on the left in the first floor picture.
A multitude of additional welds here and there as I move around, anything I have missed I go over or add. Same applies to grinding on the visible sections, ground and or sanded.
Posted by
OCDpatient1
at
10:29 AM
0
comments
Labels:
1962,
Lucia Restoration,
Split screen VW panel van
Sunday, January 18, 2015
Subscribe to:
Posts (Atom)