Saturday, February 15, 2014

VW Split Screen Front Inner Valance Done.

 Alignment check with doors and front bumper over outer and inner valance. Good fit.
 Started on inner valance to a post joiners.
 Punched and drilled holes to spot weld in. On high power so looks a little messy, but a good bite.  ;) Jenolited corroded upper section after spot welded all along top edge.
 A post to inner valance joiners also includes the a post lower closure sections. Nice
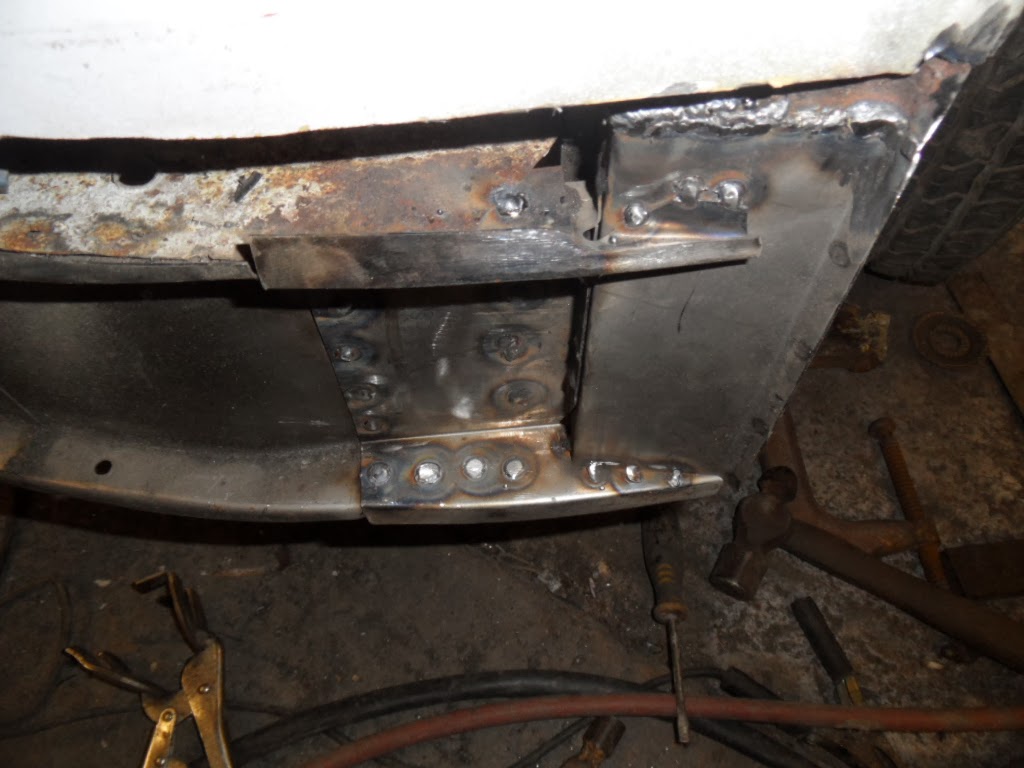
Hammer strike able now!!!
 Have applied, after "Jenolite" (upper) by brush some 2k primer to both insides of the inner and outer valance sections, including the upper inner, just visible in these photos.
 Ready for outer lower now. The the awful job of outer lower repair to the original front clip. Will joggle the repair clip. The lower section of the lower nose is bashed in and misshapen loads so will be a complex fit requiring more filler and sculpted than wanted. Consider longer clip repair???

Friday, February 14, 2014

Replace Split Screen A Posts and Inner Front Valance.

 Passenger side A post lower. Door seal runner retained.
 Essentially such good and complete set of Auto-craft Panels make fitment and alignment a reassuring experience.
 Drivers A post fitted and cleaned, again door seal track retained.
 Cab floor will be cut a little further but about forward of the wire hole.
 Welded the inner valance in just need to weld in the joiner plates and stick the front outer valance on. Prime the inner first. Would like to investigate borrowing a spot welder.....
Punch holes ready for final wiggle and fit.

A Type 5 comes calling.


Chris's new Type 5 very nice, sitting on land rover wheels with a nice camping interior.

Tuesday, February 11, 2014

Airfix VW - new brand and crew name?

Considering my Dad worked as a model maker for Airfix and I grew up on a steady diet of Airfix kits, this name has been hanging around in my head for some time.

So the classic 1973 log is:


This is bold and iconic....and I feel maybe needs a VW logo incorporated into the red section with the banner over the top. Red, Black and white seems to have a slightly nasty Nazi colour scheme though.

This logo is the early American variation:


This seems perfect as it has the feel of the classic German Eagle, but keeps its own heritage.
Airfix seems the correct term, covering all bases "classic air cooled service, hire and club/crew"

Feed back please - Tin can has a brilliant logo. Obsessive Campervan Disorder  (OCD) has been stolen already and there are T-Shirts available for purchase at most shows.   So, fellow crew members, I need your feed back as I want to sign write a logo on the hut and get window stickers and stencils cut for sign writing on our buses and beetles!! Comments please....

New Volkswagen bus for 2014

http://www.latescar.com/volkswagen-microbus-2014-price-and-release-date/

Monday, February 10, 2014

1974 Type 2 Volkswagen - Final Top Coat Mausgrau

Moving footage of the completed re-spray of Snowy out in the light. (Now in need of a new name). Its been 16 months getting it to this stage and great to finally have her ready for the final refit.

Massive thanks to all those that have helped get her this far, including OCD1, Hempy, Mr Magu....
Great paint effort by Danny of Overtons Coachworks.

See you on the road summer 2014..

Friday, February 7, 2014

Reinforcements!!!

 Wow a shed full a panels!!!
 Really nice gear from AutoCraft. All the details and correct gauges.
 High quality pressings also.
 This part is genius, a complete 1/4 floor, inner sill, sill support and outer sill all prefabricated and at the same quality as all the rest so far.

 Spots to both the support sill and the inner sill.
 The rear sill is not spot welded at the rear but is, all the way to the front, just beyond sight of this photo.
 Stamp ya feet!!!
 Air, one day.
 So upper bracket removed on passenger side.
 Also cross brace and upper and lower plates removed.
 Inner valance first fitment.
 Outer lower and upper first fitment.
 Outer lower front clip first trial.
 Wow,.....wow. Darren needs to comment on this really.
Brand new front lower belly pan mounts all there. Solid look so far....might need a longer inner b post repair for the d/s.:(

Out for some springish sunshine

Tuesday, February 4, 2014

Monday, February 3, 2014

Doors too

For those that liked my last post....

These are doors too.

That completes the required set.

Sunday, February 2, 2014

Doors ready for final fitting then top coat....

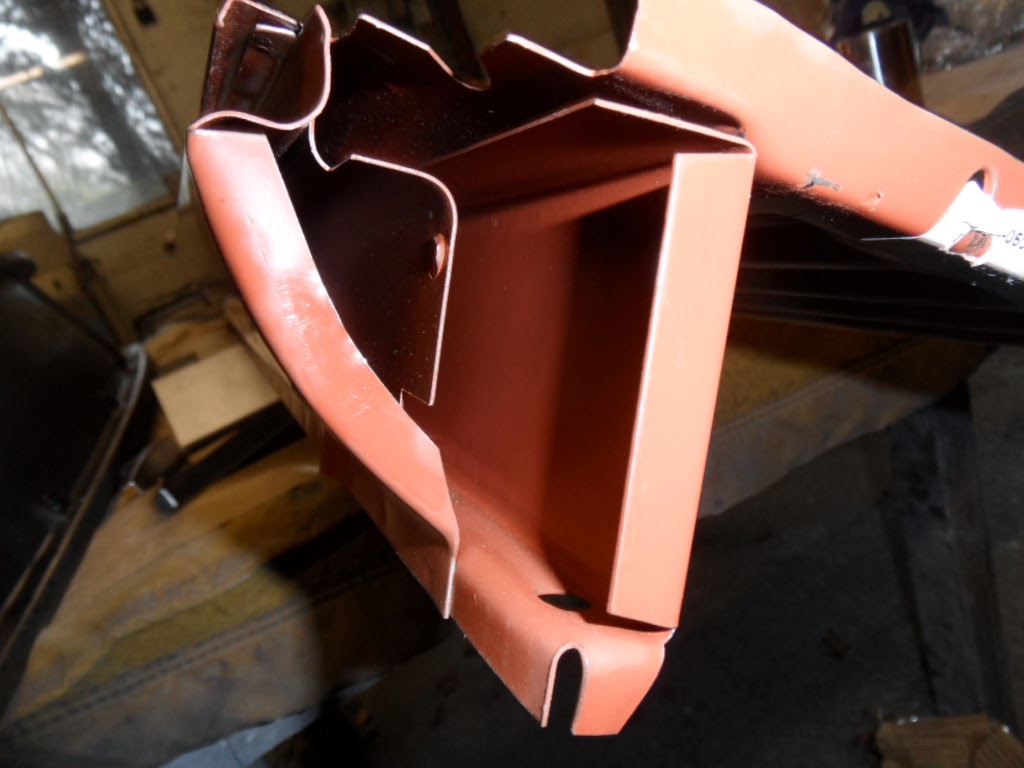
After a few tips from Danny had a bit more confidence on the rears of the doors...started with a low pressure 3bar, trigger at about 1/5 of full with about 1.5 turns out on the fan setting. Started with powdery coat and then applied little at a time. Long as it's still tacky you can keep putting it on. I need more paint in a few places but in some areas have got some nice shiny and tough looking finish. Pretty pleased, and hopefully in a week or so it'll be the final top coat with a pro at the helm. Full spraying masterclass for OCD will be coming soon stay tuned.

Nissen Hut Restoration.

 Finally got started on the outer cladding. Started slowly then built in speed.
 Just needs an run of door and window frame sealant all the way round the outer edge and door frame surrounds.
 R$ecyled the old shed roof cap as the new door runner cover....works well.


A long week and weekend,,,,but bloody productive. Need to start planning the sign writing.

T1 Split Screen Progress

 Drivers side inner sill off, giving access to the top hat area.
 Look at the state of the top hat after this previous repair.
 Passenger side front top hat or whats left of it.
 The old eaten inner sill, hiding poor fitment behind.

 \Old main heater pipe crushed split and rotten.
 Jacking point off and recycled.
 Look at the state of the chassis here, and on other side the same....scary shit.
 Heater pipe and the rear cross member gone.
 Ready for replacement, note the state of the rear top hat lower.
 Old heater pipe top.
 Cargo door side inner sill and door strengthener plate all off.
You can see the old repair to the outer door step from the underside here. I think you want a whole 1/4 outer floor repair here. Not a 1/4 just the outer 1/4 doors edge it will extend to where the floor cuts are.