

I have washed and cleaned beam plus primer coat with top coat looks great!!!!!!!!!
 So anyway got outside my house house this morning to find a note no elcie (not happy at this point) The note reads "Bought an engine" :) Phil. (appy now) The other night Gary and myself spotted a suitable Golf donor for Phil with a decent price tag .......and hes got it!!! 1.9 Turbo Diesel Golf!!! AHU engine code so will fit His Bus!!!!!!!!!!1 no more crappy buggered 1.6 polo diesel.....HELLO 1.9 Turbo Golf!!!!!!!!!!!!!!!!!!
 So Elcie has passed another MOT test without any advisories!!! Can you believe it Im now entering my seventh year of driving my bus. Silly detail I know but still quite significant, none the less. Good link to know is http://www.motinfo.gov.uk/ all you need is your number plate and a number from your latest MOT doc and it gives a history as well as current status!!


 All the welds removed and the rear valance raplaced - easy peasey, done that trick before!!
 This quarter is a lot trickier as weve had to cut away alot of bad repair work and one up the bottom half of the light appature. this allows movement in the reair panel so as to the old light to set the distance.
 Garys been busy welding in the outer sill repair and sorting out the remains of the lower front b pillar and outer.
 This then obviously leads to the front inner closing panel repair, alll good solid and slightly less Agressive work by our Gary!!!! :o
 So as we stand with just the front wheel arch and the rear quarter needing a wiggle and a weld. thats nearly it for Garys replacement of the lower 6 inches!!!!! :) :):):):)
The usual Bus Shop Madness, Jims in the House helping Neil getting Neils front inner valance sorted for Welding....much progress by all.


 Looks like rust?????????????????????
 Extra air cooling???????????????????
 Nice joggled edges and some solid spot welds here...
 Took no time to get the welder setup and the progress was quick....
 Bit messy to look at now, but with a touch of gentle grinding and seam sealent it'll look like a factory job.
  Nice coating of zinc primer under all the edges should give the steel a chance under the stone chip and sealent.
 The carpet tuck is perfect and again, after some gentle grinding, will look as good as the factory job.
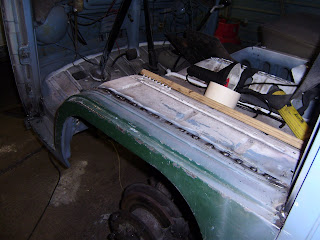 Worth every hour of hard slog and the extra cash for a genuine arch! Would reccomend it to anyone considering a cheaper repro!


.JPG)
.JPG)
.JPG)
.JPG)

.JPG)
.JPG)
